

How to use Extract Data
Extract Data reads a set of papers and fills a table: one row per paper, one column per question. Every value is linked back to the sentence in the paper it came from, so nothing in the table is a claim you can't check.
This page walks through the whole flow. For what to put in your columns, see Tips for creating better extraction fields and Example fields and use cases.
What you get
A table with your papers down the side and your questions across the top.
- Cells are condensed values, not paragraphs — written to be compared by scanning down a column.
- Each value carries quote links back to the exact sentences behind it.
- Answers that genuinely aren't in a paper come back marked Not reported, Not applicable, or Unclear — never invented.
- The whole table exports to CSV or Excel.
Creating a table
Pick your papers:
Start from Extract Data and pick your papers. The reference picker shows your Reference Manager library — folders, uploaded PDFs, and papers you've saved from search. Select up to 100 and apply.
The table opens
The table opens right away with a Summary column already extracting, so you can see it working while you decide what else you want.
Customize your extraction
A dialog opens over the table with two things:
- Research question (optional) — describe what you're trying to get out of these papers, for example, "What is the effect of intermittent fasting on weight loss in adults?" Paperguide reads it together with your paper titles and proposes a set of columns, typically 5–8, using the terminology your papers actually use.
- Explanations — see section 5.
Continue applies both. Skip keeps the defaults and leaves you with just the Summary column — you can add everything by hand instead. Skipping means no suggested columns are generated.
Adding columns
Open Manage Columns from the toolbar. It slides in beside the table, which stays visible and live — you'll see cells fill in as you work.
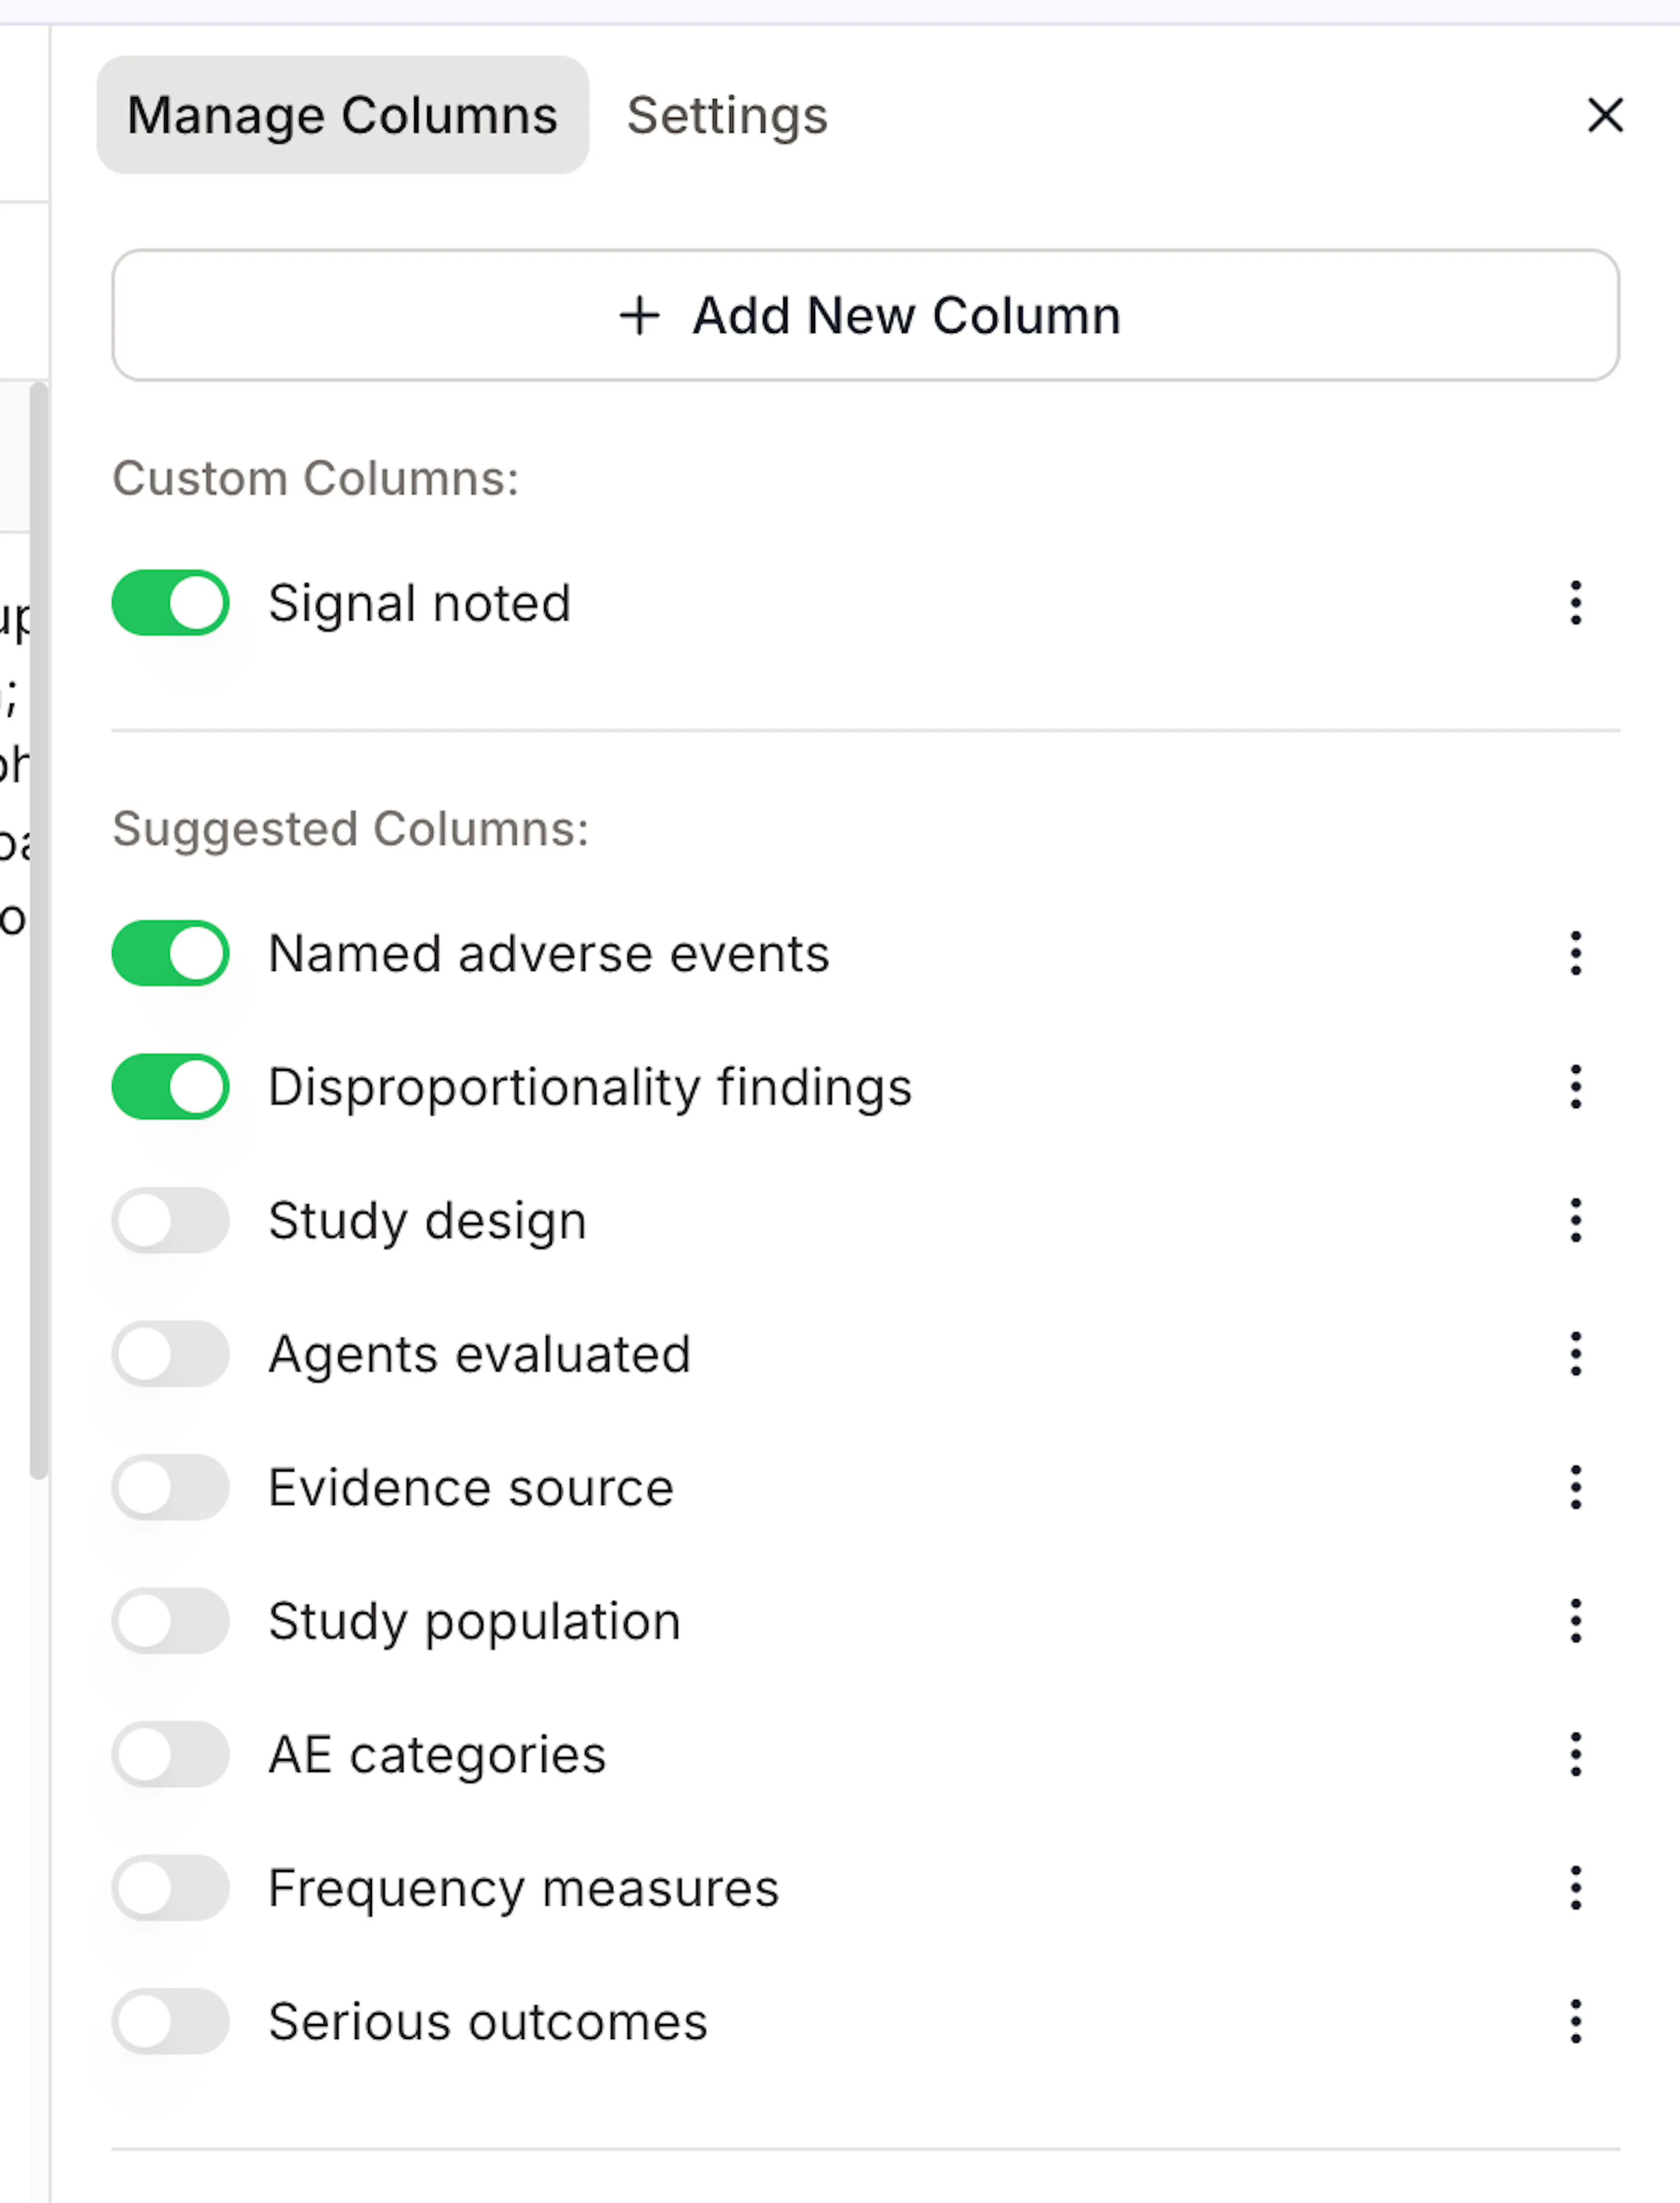
Columns come from four places.
Add New Column
The Add New Column button opens a form with three fields:
| Field | What to enter |
|---|---|
| Name | The table header. Short and scannable: Sample size, Primary outcome. |
| Instructions | The brief the AI follows literally: exactly what to extract, what to include, and the format you want back. This is where the quality of the column is decided. |
| Output Structure | Answer (free-form value), Yes/Maybe/No (screening and filtering), or Specified (one of your own labels). |
Choosing Specified adds a choice list: enter 2–10 options, up to 60 characters each. You don't need to add "Other" or "Not reported" — a paper that fits none of your labels gets a missing-data marker automatically.
Suggested Columns
If you answered the research question at setup, Paperguide's proposals appear here. Toggle one on to add it, or use its Edit action to adjust the wording first — suggestions are a draft, not a verdict.
Saved Columns
Columns you've saved, available in every extraction table you create. To put one here, use Save in any column's ⋮ menu. A saved column keeps its output type, its choice list, and its settings, so re-adding it later restores the whole definition.
Default Columns
A curated catalogue you can add as-is, or open Edit to tweak the definition before adding it to your table.
How toggling works: the switch answers one question — is this column in the table right now? Toggling on a column that isn't in the table yet adds it and starts extracting. Toggling off a column that is in the table hides it.
Managing columns
Each row in the panel has a switch and a ⋮ menu.
| Action | What happens |
|---|---|
| Switch off | The column is hidden. Its extracted values are kept — switch it back on and they're still there. |
| Edit | Change the name, instructions, output type, or choice list. Definition changes re-extract that column for every paper. Nothing else in the table is touched. |
| Save | Copies the column into your Saved Columns library for reuse in other tables. |
| Delete | Removes the column and its extracted values from this table. Deleting a saved entry only removes it from your library — tables already using it keep their copies. |
Prefer switching off to deleting while you're still exploring. Off is reversible; delete isn't.
Editing is how you iterate. Because an edit re-runs only that one column, the fast way to build a good table is: create it with 5–10 papers, get the column wording right, then add the rest of your papers — new papers extract only the cells they're missing.
Adding papers later: Add Papers in the toolbar opens the picker again and extracts the new rows against your existing columns.
Explanations
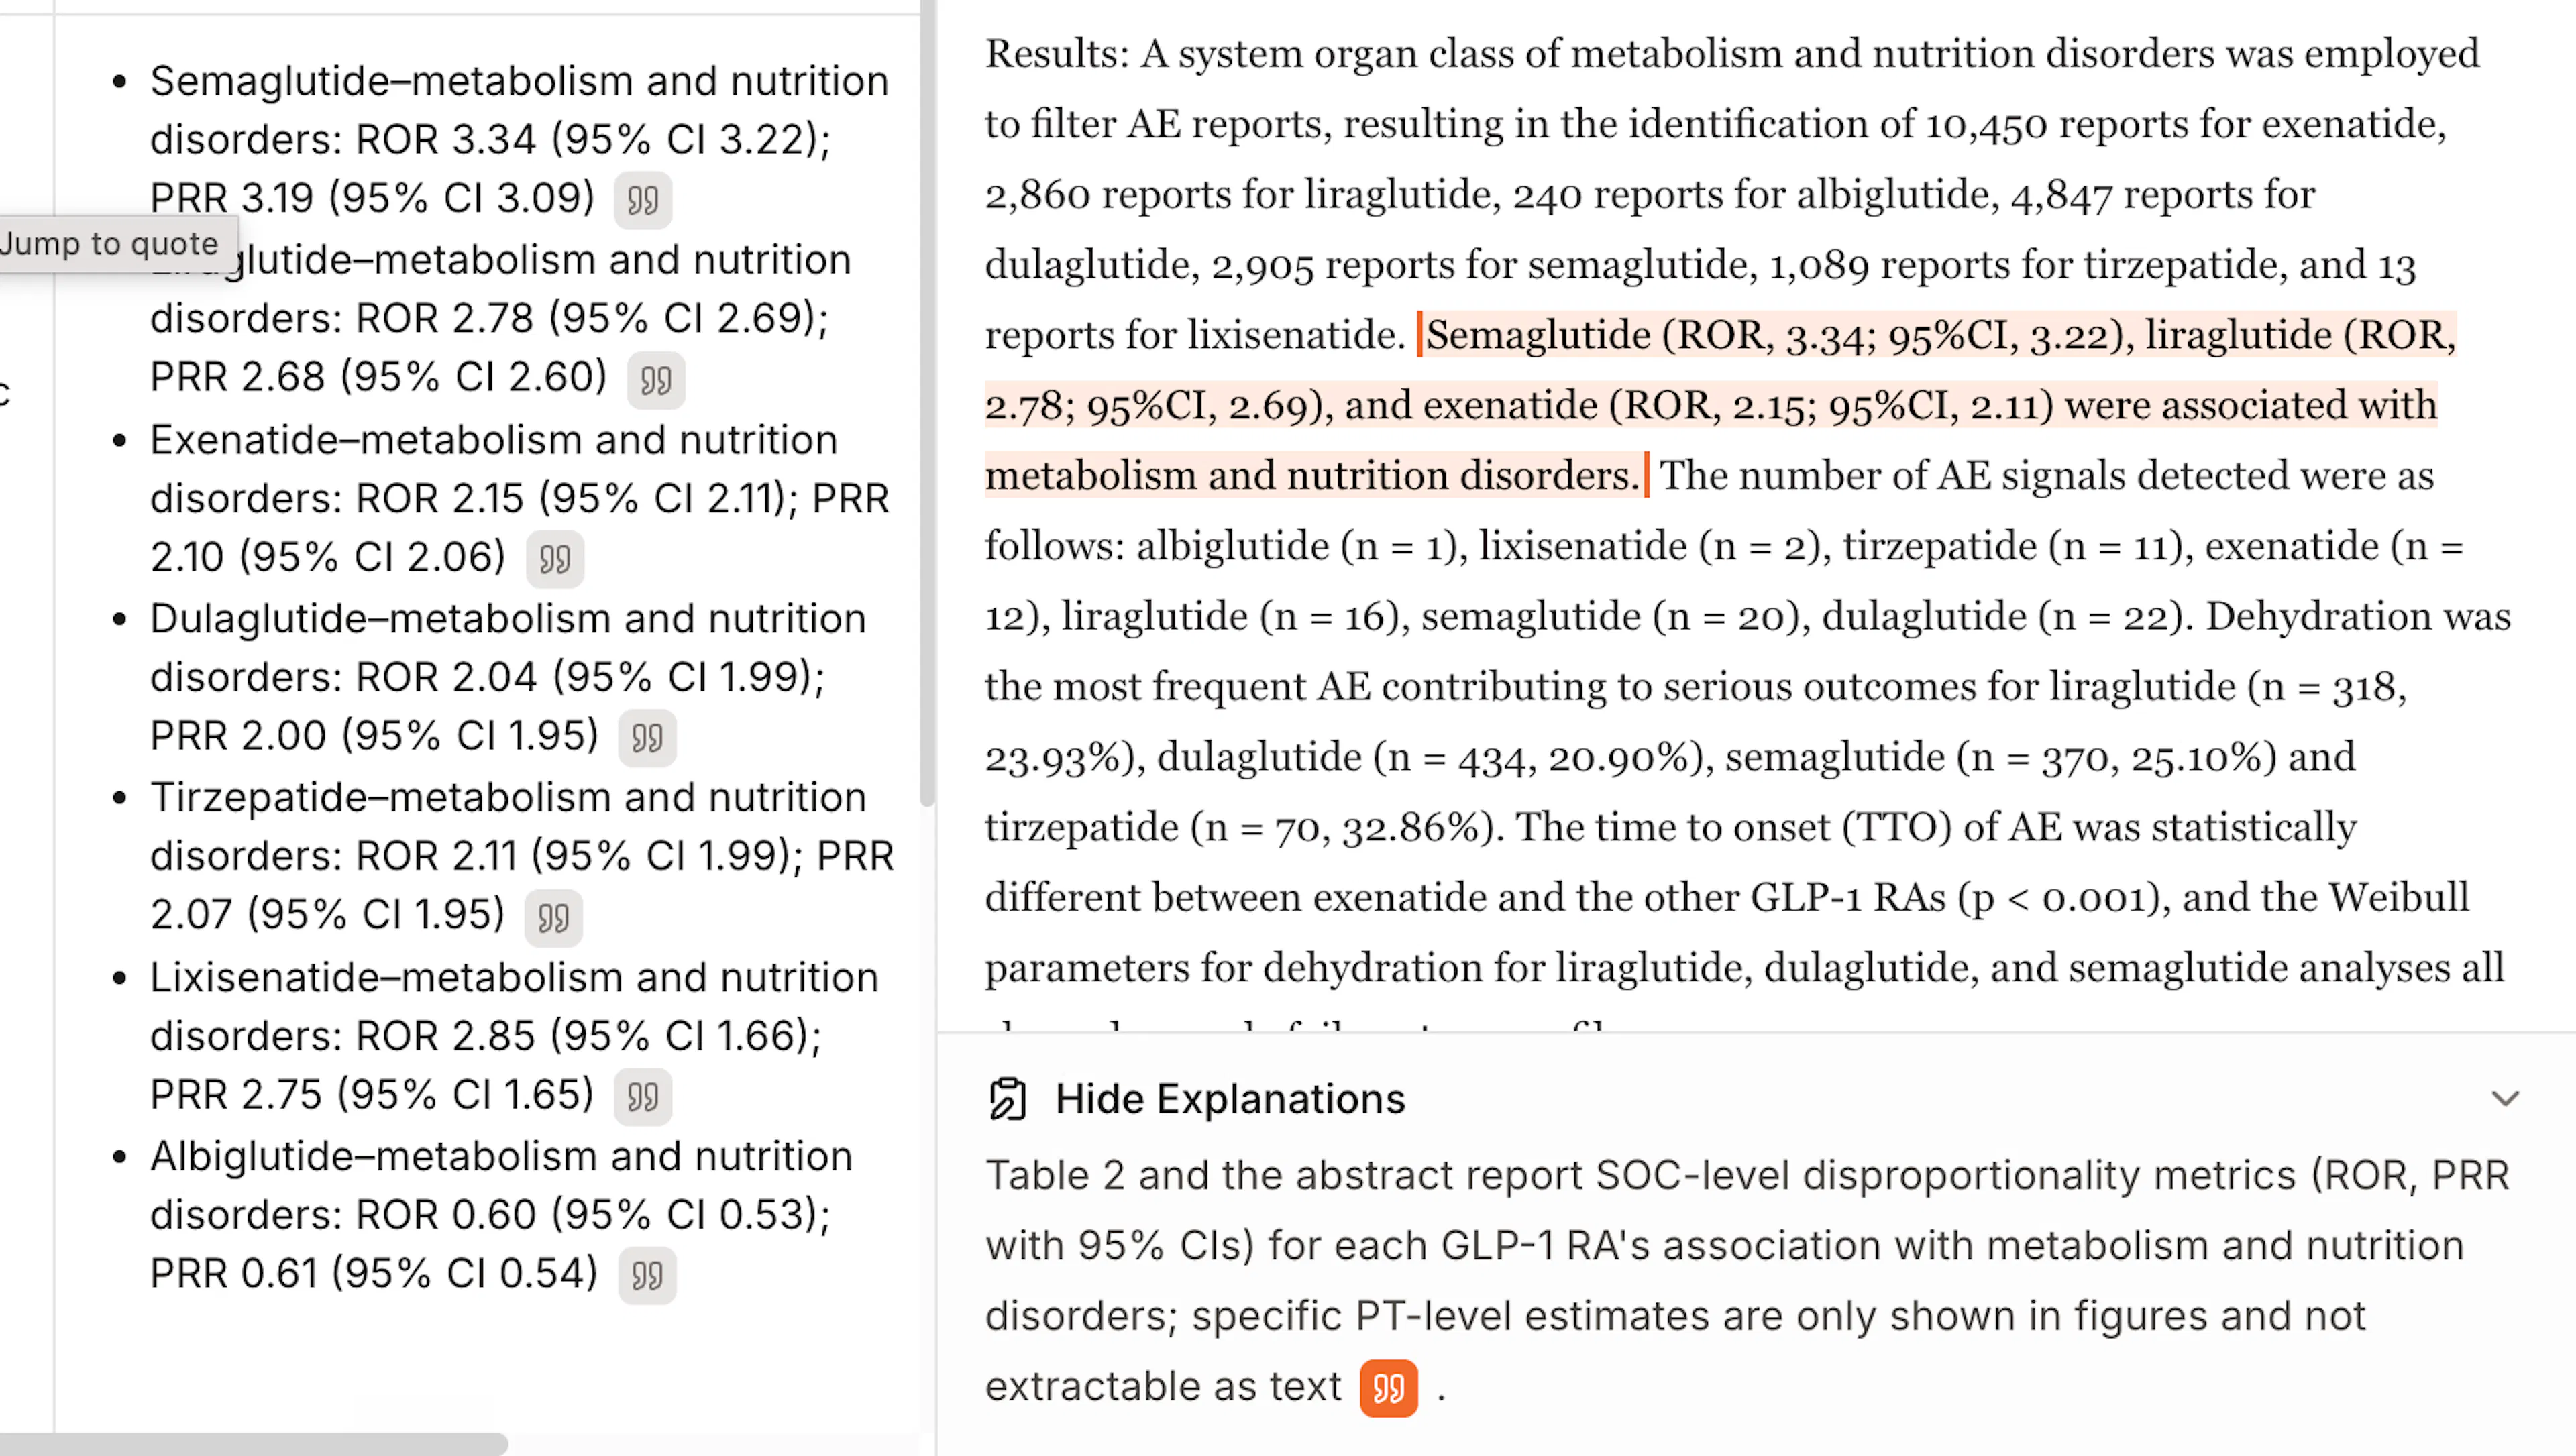
Explanations adds a short line to each cell explaining how the value was determined from the paper. Set it at two levels:
- Table level: in the setup dialog at creation, or later in Manage Columns → Settings.
- Per column: in the column form's Additional options. A toggle left matching the table keeps inheriting future table changes; changing it creates an override for that column only.
The setting applies to newly extracted or re-extracted cells only. Turning it on doesn't retroactively add explanations to cells you already have — re-extract the column, edit it, or use Retry if you want them.
When to use it. Turn it on while you're tuning a column: the explanation tells you whether a wrong answer is a bad instruction or a hard paper. Turn it off for the final read if you want a tighter table.
Yes/Maybe/No and Specified columns always explain, whatever the setting — their value is a bare verdict or label, so the justification has to live somewhere.
Quote links and citation highlights
This is what makes the table checkable rather than merely fast.
The quote link in a cell
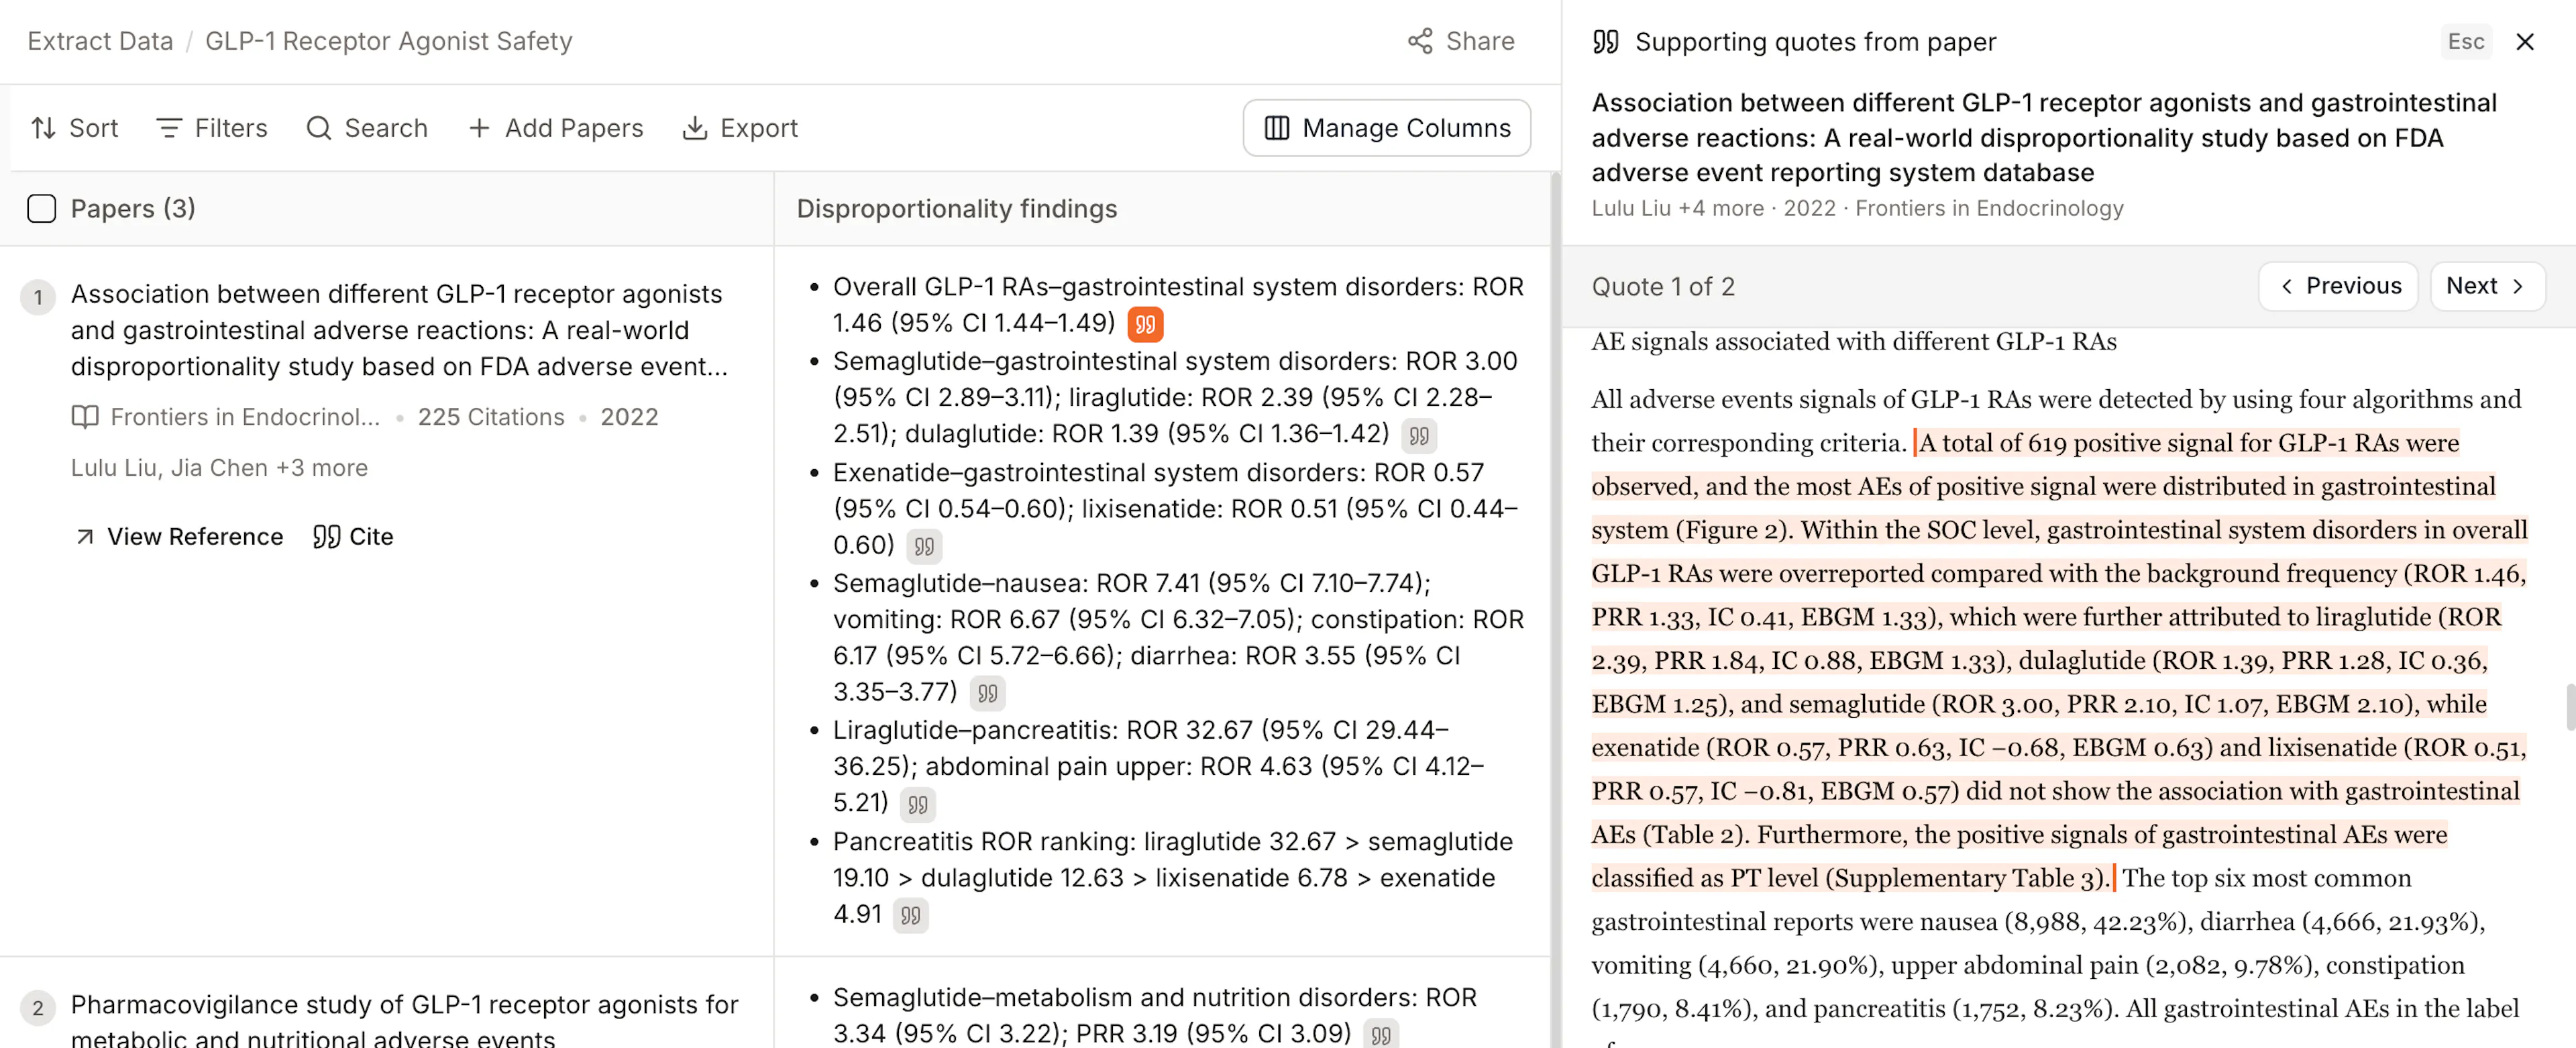
Values carry small quote icons inline, right after the claim they support. Click one and the Supporting quotes panel opens on the right, already showing that specific quote. Hovering over a cell loads its evidence in advance, so the panel opens instantly.
Yes/Maybe/No and Specified cells work slightly differently. Their value is a single word, so there's nowhere to put an inline icon — instead the whole cell is clickable. Hover it and it highlights; click anywhere on it to open the same panel.
Inside the Supporting quotes panel
The panel shows, top to bottom:
- The paper: title, authors, year, journal.
- Quote n of m with Previous and Next, when a value rests on more than one sentence. Quotes are ordered as you'd read them: full-text quotes by page, abstract quotes last.
- The quote itself, highlighted in context. Where the paper's full text is available, you get the surrounding passage with the cited sentence highlighted, scrolled into view. Otherwise you get the stored excerpt card, labelled with its page number, for example, Page 7 · Excerpt.
- Reasoning at the bottom, when Explanations are on for that cell.
The reasoning text has its own quote links. The explanation carries the same inline icons, and clicking one re-scopes the panel to that specific citation — so you can step from "why this value" straight to the sentence that supports that particular part of it.
What you can't cite
Paper metadata, such as journal, year, and authors, is context, not quotable evidence — a cell answered purely from metadata shows no quote link. And if a cell's citations can't be matched, the panel falls back to showing all retrieved excerpts rather than showing you nothing.
Working with the finished table
Watch it fill. Cells stream in as they're extracted; the header shows progress such as "Extracting 4/12". You can keep working while it runs.
If cells fail. A banner appears saying "3 cells didn't finish extracting" with a Retry button that re-runs just those cells. A cell that reads "Out of AI credits" isn't a failure: top up, then Retry.
Sort by title, from A–Z or Z–A, or by date, from newest to oldest.
Filter by source — Reference Manager, public papers, or uploaded files. Only the source types actually present in your table are offered.
Select rows with the checkboxes to switch the toolbar into selection mode, where you can export just the selection or remove those papers from the table.
Export to CSV or Excel, either the whole table or only the selected rows.
Share copies the table's link — teammates in your workspace can open it.
Quick reference
| I want to… | Do this |
|---|---|
| Get column ideas | Answer the research question at setup, or reopen suggestions in Manage Columns |
| Fix a column that came back wrong | Edit it — only that column re-extracts |
| Reuse a good column elsewhere | ⋮ → Save, then find it under Saved Columns in any table |
| Hide a column without losing its data | Switch it off |
| See why a value says what it says | Click the quote icon, or the cell itself for verdict columns |
| Understand how a value was decided | Turn on Explanations, then re-extract |
| Add more papers | Add Papers in the toolbar — only new rows extract |
| Get the data out | Export → CSV or Excel |
| Recover failed cells | Retry in the banner |
Related: Tips for creating better extraction fields · Example fields and use cases